Check out the demo
Use the search bar to look for specific features or just click around.
Demo site
Create an Annotated Image Site
updated: 29 March 2016
Follow these instructions to create an annotated image in inkscape and the corresponding website.
- Fork this project to create a copy for your github account or Download the repository and transfer the files to a folder with an appropriate name
- Places to find images:
- Specimage
- USGS Bee Inventory
- Alex Wild’s Ants
- Please give proper attribution when necessary
- Open the _data folder and then open the hao_terms.json file
- you will notice that each entry has 5 attributes including a unique
ID
{ "title": "Antenna", "definition": "The appendage that is composed of ringlike sclerites and the anatomical structures encircled by these sclerites and that is articulated with the cranium.", "URI": "http://purl.obolibrary.org/obo/HAO_0000101", "Preferred.Term": "antenna", "ID": "HAO_0000101" },- Leave this file open, you will use it as you annotate the SVG
- you will notice that each entry has 5 attributes including a unique
- Open template.svg from the _includes folder with inkscape
- Import (
ctrl+i) the image file from the into template.svg- select embed
- resize the image to fit within the page (solid lines)
- alternatively, you can resize the document (
ctrl+shift+d) to fit the image
- Save the document as a plain SVG and rename it
- Start by outlining larger features - order is important for the click functionality
- Pressing
Bwill bring up the bezier tool, this allows you to place points around a feature and modify them to create curves. ctrl lautosmooths the shape
- Pressing
- After you have outlined the segment, change the fill
ctrl+shift+fto RGBA 97cafcff and the stroke to none- use
ctrl dto bring up the dropper tool - holding shift with the dropper tool allows you to change the outline color
- use
- Select the feature you just created (quickly switch to the selection tool by pressing
S) and pressctrl+shift+xto open the XML editor.- press
ctrl gto make a new group (do this even if the feature is a single path) 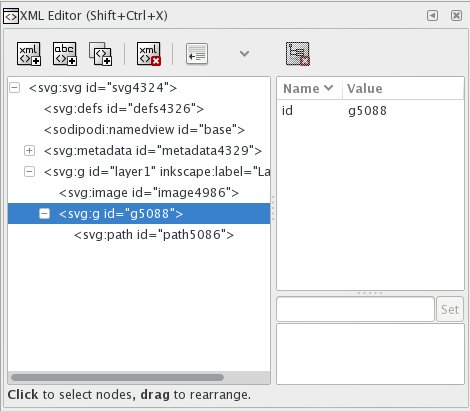
- press
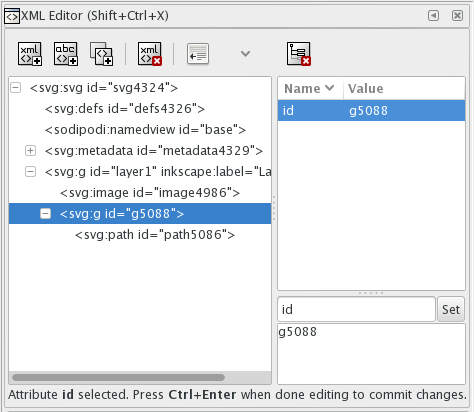
- Click on
idin the Name column - Change the group id to the proper id in HAO_terms.json
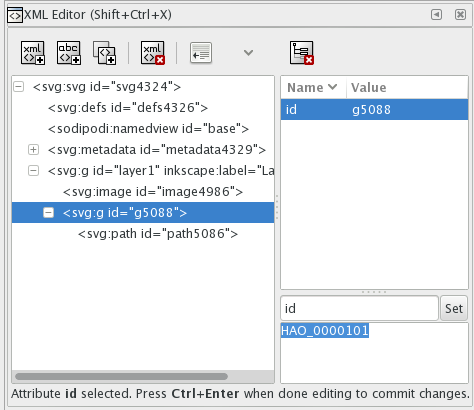
- NOTE use
ctrl vto paste in inkscape - click
setto change the id
- Give the feature the
class“bodypart” by entering “class” into the attribute name bar and “bodypart” into the attribute value box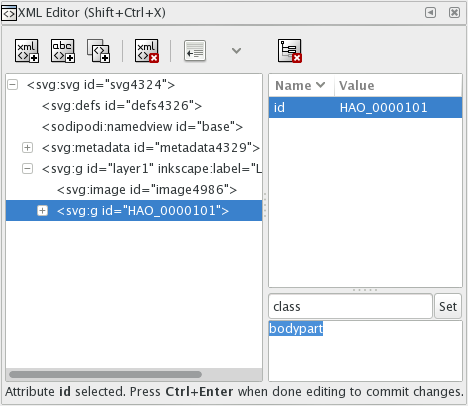
- click
setto change the class - this a good place to save
- Repeat steps 7-12 until all visible HAO terms have been added.
- Open your SVG in a text editor (eg TextEdit or NotePad) and delete the first line
- delete the line selected in this image

- Copy the remaining text and paste it into the file
svg.htmlthat lives in the _includes folder- You can use TextEdit for this as well
- If there is already text in the
svg.htmlfile, replace it with the new svg text - CAUTION TextEdit may be setup to display formatted html. You want to see the code.
- Open
index.htmland change the title - If you have downloaded the files and this is your first time working on them, log on to github and click the new repository button
- Initialize with a read.me and write something nice about your image
- click create repository
- drag and drop all the files into your repository
- do not add the containg folder
- If you are doing everything in github, change the name of your repository in the settings tab
- Create a new branch in your repository called
gh-pages - Request that your annotated image be added to the organization page and pat yourself on the back.
Running the site locally
This site is built with jekyll.
To run the site locally make sure that jekyll is installed
gem install jekyll
which -a jekyll should return a ruby shim path (not a blank)
and/or running jekyll returns a list of options
Navigate to the folder in the commandline cd path/to/folder
After that, jekyll serve should boot up the site at localhost:4000
If that doesn’t work. Check out the instructions for installing jekyll here
If you don’t have rubygems installed you might need to install the following: